Setting up the microSD card
The SD card that comes pre-installed in your MEGA65 can act as your computer’s internal storage. As an alternative, you can use a microSD card in the externally accessible slot on the back of the computer. This requires preparing the microSD card for use.
You will use the memory card to update the firmware and store updated system software and ROMs. You will also use it to manage D81 disk images and store applications you have downloaded.
Preparing the microSD memory card
To use an SD card with the MEGA65, it must be formatted (erased and prepared) using the MEGA65. The SD card works like a regular storage drive when connected to your PC, but it contains additional data not visible to the PC that is used by MEGA65.
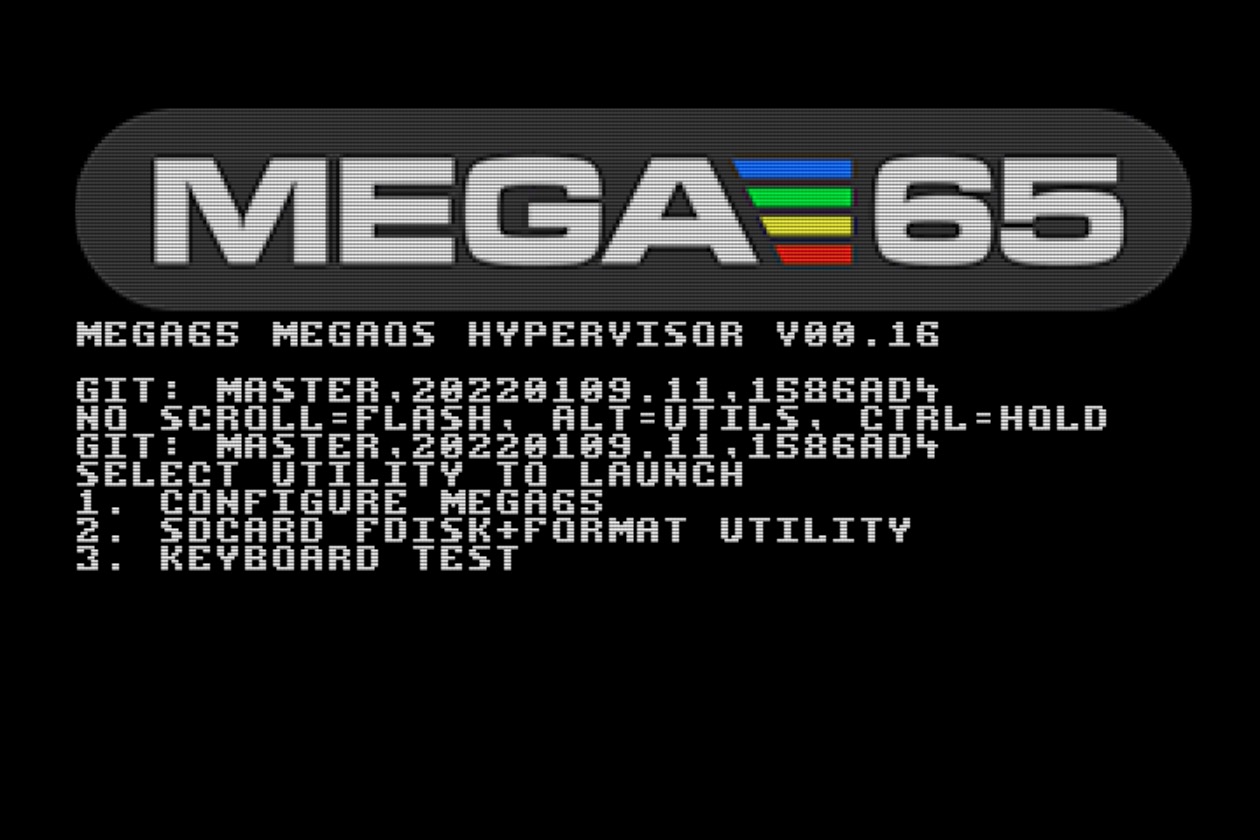
To prepare a new microSD card for use, insert it into your MEGA65’s external microSD card slot. Turn off your MEGA65, then hold the Alt key (top row near the left) and turn it on. Select option 2: SDCard FDisk+Format Utility (press 2).
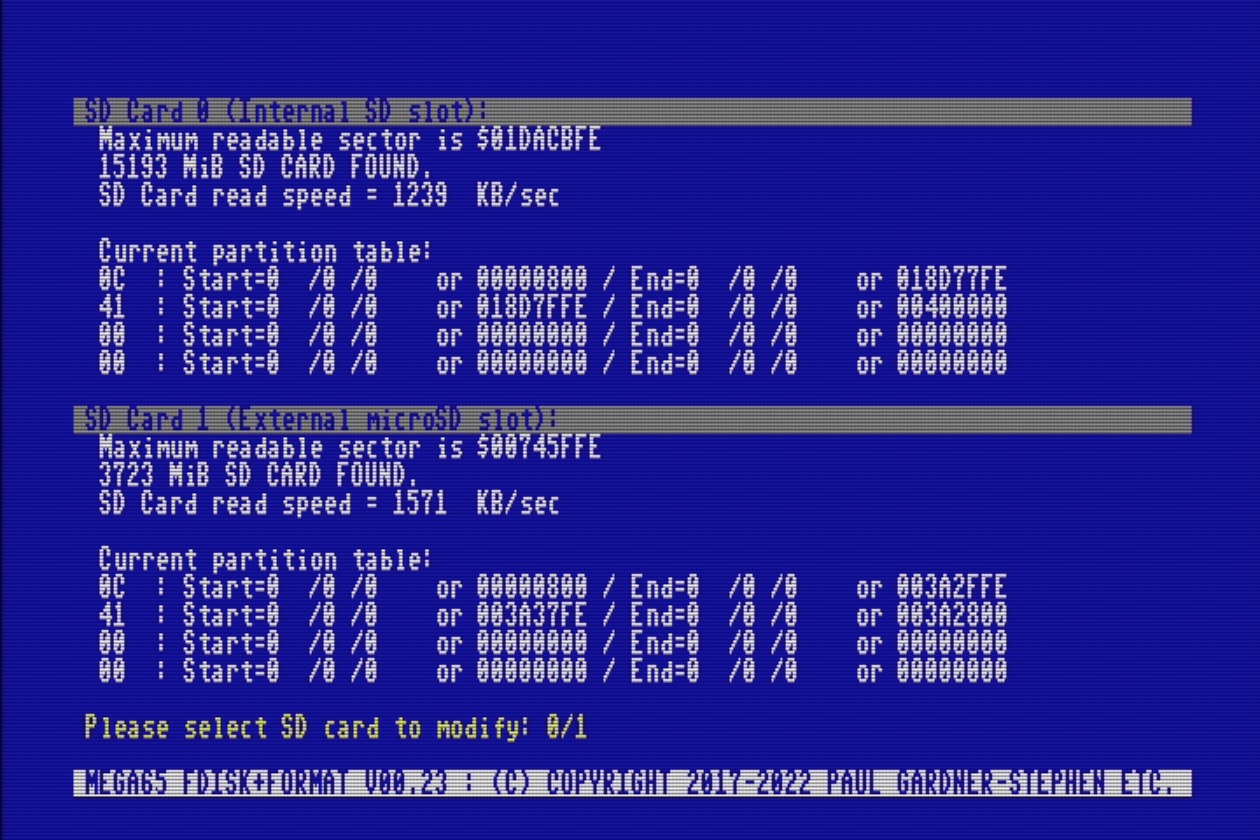
The SD card utility will look for cards in the available slots. Confirm that it has detected your microSD card correctly, then select option 1 for the external microSD slot (press 1).
Caution
The SD card utility will erase the internal SD card if you ask it to. Be careful to select the correct card.
If prompted to do so, type the confirmation message, DELETE EVERYTHING, then press Return. Be sure to use uppercase (shifted) letters. The MEGA65 formats the SD card, erasing all of its data.
You will be prompted to “populate” the SD card using system files from the core. If you have not installed any other MEGA65 cores, it will use the factory-installed core for these files, including the system software and the MEGA65 ROM that were bundled with that core’s release package.
Tip
If you have installed an alternate MEGA65 core, you’ve been reading ahead! The SD card utility will ask you which core to use for the system files. Note that if you use a “development” version of the MEGA65 core that isn’t from a release package, the core will be missing the MEGA65 ROM (mega65.rom), and you will have to install it separately before the system will boot.
When the process is complete, you can switch off the computer, then switch it on again. Because the freshly formatted SD card is missing configuration data, this will restart the “on-boarding” configuration process mentioned earlier. After completing this again, you may want to open the Configuration utility again to reinstate more settings. Hold the Alt key and turn on the MEGA65, then select 1 to configure your MEGA65.
Restoring the Intro Disks
The freshly populated SD card contains the system software and ROM, but does not contain the demonstration software package that was bundled with the computer. You can download a fresh copy of this package from the Internet.
Make sure you are signed in to Filehost using your owner account, then visit ALL INTRO DISKS - Private. Download the package .zip file to your PC. Expand the archive and locate the sdcard-files sub-folder.
If you have the latest v0.96 release package installed, the best way to copy these files to the MEGA65 is with an Ethernet connection. See the User’s Guide, 2nd edition for instructions.
If you are using a previous release or would prefer not to use Ethernet file transfer, you can remove the microSD card from the MEGA65 and connect it to your PC with an SD card reader.
Copy the files from the sdcard-files sub-folder to the root of the SD card. If you moved the SD card to your PC, eject it properly using your PC’s operating system, then re-install it in the MEGA65’s microSD card slot.
A note about file fragmentation…
It is possible—and sometimes necessary—to remove the SD card from the MEGA65 and connect it to your PC to transfer files. This comes with a couple of caveats.
Files are stored on storage devices as blocks of data. With the FAT32 filesystem used by the MEGA65 SD card data partition, sometimes a modern operating system will store these blocks in multiple disconnected regions of the card, as a “fragmented” file. Modern computers are not bothered by fragmented files, but (as of the February 2024 firmware) the MEGA65 can’t support these. If a disk image file is fragmented, the Freezer won’t mount it. If a system file is fragmented, the MEGA65 might not work correctly.
If you believe you are having an issue due to a fragmented file, one way to fix it is to move the SD card to your PC, copy all of the files to a folder on your PC, delete the files from the SD card, then copy all of the files back to the SD card from the folder on your PC. As an alternative, this article recommends using defragmentation tools on the SD card, but I have not tested these.
You might also hear about a procedure for updating an existing file that involves renaming it, copying the new version, then deleting the old version. The idea is to force the PC to use an empty contiguous region on the card for the new version, and not try to reuse the blocks of the old version. I find this process cumbersome, but it’s worth knowing about.
The easiest way to avoid both of these issues is to use Ethernet file transfer for everything. You may need to connect your SD card to your PC in order to upgrade to the v0.96 release. Once you have v0.96 installed, you can use Ethernet file transfer for everything else. Ethernet file transfer never creates a fragmented file.
Note
Another caveat for Mac users: macOS Finder likes to install additional hidden files on external storage devices. These files are harmless, but will clutter file listings on the MEGA65, because the MEGA65 doesn’t know to hide them. There are quite a few tools available for macOS specifically that can clean up these files off of external storage devices automatically. I have personally tested and can recommend BlueHarvest.
I often just delete these myself with command-line tools, but this risks deleting something you don’t intend to delete, so I won’t describe that here.